Thursday, April 12, 2018

 https://mirillis.com/download-action


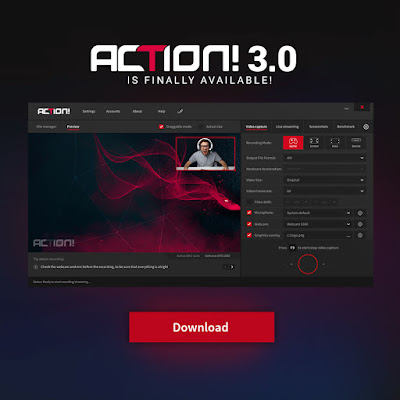
Mirillis Action! 3.0
 is all-in-one software for Windows Screen and Game Recording and Live Streaming. 

The program offers such features as Device Recording Mode, On-Screen Drawing Panel, Computer Benchmark and System Performance Monitoring.


Powerful and incredibly easy-to-use Action! 3.0, apart from capturing high-quality screenshots of a Full Screen or selected part of your desktop, offers 4 really robust recording modes:

1)     Game recording mode – dedicated for Gamers and Live Streamers

2)    Screen recording mode - E-learning, educational purposes, classroom activities, webinars, tutorial guides, Skype or Hangout calls recording, marketing video creation and more. - possibilities are countless!

3)    Active desktop region mode that enables screen recording of selected part of a desktop

4)    Device recording mode which allows you to capture video from your PS4, Xbox or other external devices like TV, mobiles, etc.

Thanks to Advanced Overlay Management System for Live Streaming you don’t need any additional display monitor to control your stream because all information you need is already in front of you on one desktop. The system allows you to:

› add up to 6 modular URL Overlays such as Twitch chat, Alertbox etc.
› easily customize your Logo, Webcam, and other Widgets
› use Green Screen Effect for webcam or 3D Intel RealSense Background  Removal
› monitor the status of your recording and game performance
› Live preview of your video composition


Mirillis Action! Features:


› 4K Ultra HD Video Capture
› Voice and Audio Recording
› USB/HDMI Capture Devices
› On-Screen Drawing Panel
› Benchmarking
› CHROMA KEY and ALPHA MASK
› Webcam and logo overlays
› Screenshot Capture Tool
› Fast export and upload to YouTube and Facebook


What's new in Action! 3.0?

NEW FEATURE: Live preview of video composition
NEW FEATURE: Accounts manager (YouTube, Facebook etc.)
NEW FEATURE: Drawing Panel (draw shapes and texts over any borderless windowed games in real time!)
NEW FEATURE: Performance improvement
NEW FEATURE: Support for web browser overlays
NEW FEATURE: New advanced multi-layer HUD (view chat overlay over any streamed game on one monitor!)

NEW FEATURE: Support for 4K webcams
and more!

Action! 3.0 is an excellent Game Recording Software that captures Smooth Gameplay in Ultra HD quality, low CPU use, and no FPS loss. Program records games in outstanding 4K Ultra HD up to 3840x2160 resolution with no time limitation.
Device recording mode allows capturing video from gaming consoles such as Xbox or Play Station. The program supports Elgato, Avermedia and Hauppauge capture cards.
Action! HUD displays free disk space, viewer counter statistics, FPS (Frames Per Second), mic volume level, duration of your recordings and webcam preview if enabled.
With Action! 3.0 New Account Manager you stay logged-in to all popular live-streaming services and quickly switch between sessions. This makes Action! one of the most convenient PC Screen Recorder software on the market.

If you are a Steam user and would like to record your Steam games with Action! 3.0 you can get a full version of the software on Steam and enjoy high-quality video recordings of your gameplays with Action! 3.0 Steam Edition.

Thursday, September 21, 2017

New Mirillis Blog

Hello!

We would like to invite you to our new blog. From now, all new articles you will be able to read here:

Monday, April 24, 2017

Adding custom frames and shadows to webcam videos

With Mirillis Action! Screen Recorder overlay graphics option you are able to make your videos even more entertaining! Add logo or use overlay graphic option to make your webcam video more outstanding.


First, before we start to create overlay graphics with custom frames or shadows, we need to setup webcam size and position. To setup webcam recording settings please open Action! Webcam Settings.


1. Select Webcam device in main Video recording tab. Then open Webcam settings again and use Position and Video size options to adjust webcam video size and position. Use webcam preview to see how webcam video will be placed in your final desktop or gameplay recordings. 


Make a test desktop or gameplay recording to check if you like current webcams settings. 


2. Use your favorite graphics editor and create a PNG file with frame, shadow or any other graphics you would like to add around your webcam picture. Please note that webcam picture will be added over overlay graphics.


3. Go to Action! settings and click on Overlay graphics settings. Make sure to enable Use overlay graphics option, select your PNG file as Input file and set correct overlay graphics Position.

4. Make a test desktop or gameplay recording to check if your overlay graphic is placed correctly.


TIP: Use your webcam recording test video to make sure that overlay graphics will perfectly match webcam picture. Play test video with 100% video size (press "1" in Action! Screen Recorder's player), make a screenshot and use it as a reference to create your PNG graphics.

Tuesday, January 17, 2017

Action! 2.1.0 is now available - check what the new version offers!

Action! 2.1.0 is now available.


What's new in Action! 2.1.0?

  • NEW FEATURE: Full live streaming/login API integration with Facebook, YouTube, Twitch and Hitbox
  • NEW FEATURE: Real-time live streaming viewers counter statistics displayed on HUD
  • Live streaming start button added
  • Live streaming privacy selection for Facebook and YouTube
  • Recording performance fixed on specific Win10 systems
  • Fixed Facebook video uploading
  • Fixed Action! startup with Elgato device installed
  • Fixed Action! AVI recording when very large cursors are visible (ex. Photoshop)
  • Fixed OpenGL recording (Intel GPU ex. Minecraft)
  • Fixed OpenGL recording (Exanima game)
  • Stability fixes
  • GUI improvements

Active desktop region recording mode [Screen Recording 101 by Mirillis]

Active desktop region recording mode is dedicated for recording only selected screen area of Windows Vista, Windows 7, Windows 8 & 8.1 and Windows 10 desktop. The ultimate performance of Action! Screen Recorder makes it a perfect tool for recording videos, web videos, games, and any other screen activity.


Examples of what you can use Action! desktop region recording for:

  • recording selected desktop area of Windows Vista, Windows 7, Windows 8 & 8.1 and Windows 10
  • recording selected area of Windows 8 and 8.1 Modern UI applications and games
  • recording online games in a web browser or windowed mode
  • capturing all web videos
  • creating video tutorials
  • recording videos played in media players in windowed mode
  • recording all applications, games, and websites
  • capture screenshots of selected desktop area


1. Select "Active desktop region" recording mode.


The main window of Action! will hide and Action! will switch to the desktop region recording mode. Use mouse to select your region size and position. You can precisely control region size and position with the keyboard: use arrows to move a region, use SHIFT + arrows to resize a region.

The green frame indicates that region is accepted and Action! is ready to start recording. Gray frame indicates that current region cannot be recorded. 

The region cannot be recorded when it includes the area of 2 different desktops.


The Action! HUD should be visible in the top right (the default position) corner of your screen showing that Action! is connected to your Windows desktop and ready to start recording the region of desktop you have previously selected.


2. Active desktop region recording

Press "Start/stop recording" button or F9 hotkey to start Windows desktop recording.


When you start recording the frame turns red showing that the recording of your selected region is in progress.


HUD status also changes showing that Windows desktop region recording is in progress.


Press "Start/stop recording" button or F9 hotkey to stop recording. The region frame color and HUD status will change showing that Windows desktop region recording has finished.

3. Desktop region recordings playback

Open main window of Action! Screen Recorder and check the list video recordings. The video recordings list shows all your desktop recordings, gameplay recordings and any other screen recordings available in selected output folder.


Action! features internal fast player dedicated for the playback video recordings. Select your new desktop recording and use mouse double click on a thumbnail to start video recording playback.


To play Action! video recordings you can use Splash 2.0 media player.

Splash 2.0 provide you with additional features like SmartSeek, Audio boost, Screen capture and more. All Splash products are available for download at Mirillis website:

Friday, January 13, 2017

Monflo – new remote gaming and access software by Mirillis

Monflo – new remote gaming and access software by Mirillis

As some of you may already be aware of, Remote Action! is gone. The project of Remote Action! has been expanded and we have created Monflo – a universal remote access software for gaming and personal and business use.


With Monflo Remote PC Access Software you can gain control over any server computer that have added your client device to their trusted list or connect to them using Connect ID feature.

Our brand new remote access software will let you use any application from your server Windows computer on your Android mobile device or another Windows computer, as well as access any files that you need and play all the games installed on your PC!

When developing Monflo we have taken into account any features and functionalities that can, and will, make your life easier. Access to some of them is different, according to the subscription plan you have chosen. But, let’s make it clear – Monflo in its basic version is FREE, what is enough to remotely play your favourite games on your mobile devices.

If you need Ultra HD quality of streaming or HEVC video streaming, possibility to record your sessions, file transfer, benefit from Connect Anywhere feature, or use it commercially, then you have to choose one of the paid subscription plans.

Interface – the beginning of journey

Monflo’s interface is clean and intuitive – it can be seen from the very beginning.


You can log into Monflo either through your login and password (account is required) or Connection ID (for more details on what Connection ID is check https://monflo.mirillis.com/remote-pc-access/tutorials/connection-id-tutorial#tutorial).

The best features

Favourite applications and games lists

With Monflo you can create and manage your own personalized favourite applications and games list on your PC to access all the apps and games later with your Android mobile device. This allows you to run your Windows applications on Android easily just with a single tap.

The applications list and the games list are separate.


Connect Anywhere

Connect Anywhere is a feature that lets you to connect your Client device to your server wherever you are.
There is no restriction in using Monflo to get remote access over your Server computer from your Android device or another PC computer.
Connect Anywhere is only available in Premium Plus, Corporate and Enterprise subscription plans. In Free and Premium subscription plans the access to the service may be restricted or unavailable.
For more see https://monflo.mirillis.com/remote-pc-access/tutorials/connect-anywhere.


There is really many of Monflo features to discover.

If this have made you curious you should definitely download Monflo Remote PC Access Software and see by yourself for what it can useful and how much fun it can give you!

Visit Monflo website


Wednesday, January 11, 2017

Time-Shift Feature [Screen Recording 101 by Mirillis]


Time-Shift - the life-saving feature of Action! Screen Recorder


Have you ever lost a chance to record a perfect in-game action because you forgot to turn on the recording? 


Well, you can say “goodbye” to all the lost opportunities – Time-Shift feature is here for you.Save your last gameplay actions by pushing just a single hotkey, which you define by yourself. Time-Shift option keeps recording all your current gameplay action in a short loop buffer.


How to enable Time-Shift function?
Time-Shift feature is available only for Games and applications recording mode. Run Action! Screen Recorder and make sure that Games and applications recording mode is selected. 
Find Time-Shift option and make sure it is enabled.


Adjust your Time-Shift duration, video recording settings (video size, framerate etc.) and run a game. Working Time-Shift option is indicated on Action! HUD:

To save your Time-Shift recording to a file just press a hotkey. Default hotkey to save Time-Shift to a file is: Left Alt + F9

How to save Time-Shift to a file?
To save Action! Time-Shift to a file you have to use a hotkey. Default hotkey is: Left ALT + F9 

What are Time-Shift requirements? All you need is an active "Games and applications" recording mode and a free disk space! It's really easy. Hardware acceleration for video encoding is also recommended, but not necessary.


Time-Shift feature has only a few limitations:
  • The feature is available in "Games and applications" recording mode only 
  • Minimum Time-Shift buffer duration is 10s.
  • Maximum Time-Shift buffer duration is 10 minutes.
  • Time-Shift recordings are available in MP4 file format only 
  • Maximum recording resolution is 1920x1080